Recent Posts

Homemade Ginger Wine Recipe 


Christmas reminds us of the Christmas tree, shining colorful stars, carols, nativity scenes, twinkling lights, decorations, foodies and of course the special home made wine. Ginger wine is popular and is served to all the family members and friends who visit our homes during Christmas time. It is a very simple and healthy recipe and can be done a fortnight prior to Christmas time.

Ginger wine has a smooth and moist taste and therefore a popular choice by all. Ginger wine has some wonderful health benefits. Ginger is not only a spice that adds flavor, it is also used as a remedy for many sicknesses and disorders since ages. Ginger has long been known to increase libido. It also increases blood circulation and therefore during winter days it can be served as a health tonic in small measures.

Drinking a glass of ginger wine when you are stricken with cold, will get you back on your feet in good health quickly. Ginger  is an ideal home remedy. Ginger relaxes the body so that the white blood cells can do their job in repairing the damaged cells; it also blocks the hormone that induces fever, headaches and body cramps.

I wanted to share this ginger recipe to make sure you can have a surprise menu for your family.

Ingredients:

  • Ginger – 125 gms (finely chopped)
  • Sugar: 750 gms
  • Water : 1 litre ( boiled and brought to room temperature)
  • Yeast : ¼ tspn
  • Dry red chillies: 2 nos
  • Citric Acid: 10 gms
  • Caramelized sugar (optional)

Method:

  • Clean the ginger. Chop ginger into fine pieces.
  • Boil the chopped ginger with water, sugar, and broken red chillies for 5 to 8 minutes. Let it cool.
  • Strain the contents. Add yeast and citric acid to the mixture. Stir well till all the crystals are dissolved.
  • Pour ginger wine to air tight containers or you can use the ceramic jar popularly known as barani.
  • The wine is ready for use after 3 days of storage. Hey! you will agree that this was a simple home made ginger wine recipe.

Note: All the storage bottles should be clean and dry prior to transferring the wine for bottling. Fill upto 2/3 of bottle quantity. Leave gap on the top side of the bottle. A safety measure for long term storage.

You can use caramelized sugar to enhance the color of the wine. We like it plain at our home. In case you plan to add caramelized sugar follow this procedure.

For caramelizing heat 3 tspns of sugar in a flat kadai. When it melts on a low flame and start burning add ½ glass of water and mix all the blackened sugar. Filter and add this into the mixture prior to bottling.

Label the bottle with the details of content, date of preparation and best before date. Keep the bottles in a dark and cool place. Best use within 12 months of preparation.

A very simple recipe, yet your timeliness will be appreciated by all who taste the ginger wine. Let this ginger wine be a surprise to all family members too. This can be made into Christmas gifts to your dear ones. This wine is made at home and is a healthy drink. There are no side effects.

Go ahead and surprise your family with this special drink.
Cranberry Onion Chicken Recipe


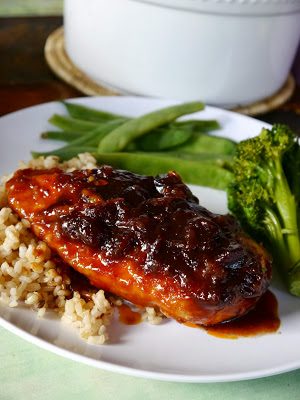
This is one of the most delicious, easy, and quick meals you will ever make. It uses only 4 ingredients, can be prepared ahead of time and frozen or refrigerated until ready to use, can be cooked in the oven (my preference) or the crock pot, and is loved by kids and adults. Another reason I love it is because it’s easy to keep the ingredients in the pantry and freezer and make on those busy days when I hardly have any time to spend in the kitchen. One time a friend told me that she had nothing in her kitchen to make for dinner. I lent her a can cranberry sauce and she used the other ingredients from her pantry to whip this up quickly.

I got the recipe at my wedding shower and stored it away for years before trying it. The title said “Barbecue Chicken,” and I was never too interested in a complicated barbecue chicken recipe, since you can just slather a bottle of barbecue sauce on chicken and call it good. But, I decided to try it out and am SO happy I did. It is definitely not barbecue chicken. I like it better!

INGREDIENTS:

  • 6 boneless skinless chicken breasts
  • 1 (16 oz.) can whole berry cranberry sauce
  • 1 (1 oz.) envelope Lipton onion soup mix
  • 1 cup Russian, French, or Catalina salad dressing

DIRECTIONS:

1. Preheat oven to 350 degrees F. Grease the bottom of a 9×13 baking dish. Place chicken breasts in a single layer in the baking dish.

2. In a medium bowl, combine cranberry sauce, soup mix, and salad dressing. Pour over chicken.*

3. Bake, uncovered, in oven for approximately 50 minutes, or until chicken is cooked through. Serve over rice (brown is our favorite!)

*At this point, you can put all of the ingredients in a freezer bag and freeze for another day. Just be sure to thaw before cooking. To cook in your crock pot, place ingredients in the crockpot and cook on low for 4-6 hours. To prepare the day before cooking, or the morning before, just cover and refrigerate until ready to cook.

Coquito Affogato Recipe


I’m smiling right now. I mean really cheesing and it’s because of this, Coquito Affogato –  right now.

Affo- what?

That’s Aff-oh-gah-to which is Italian for “drowned”. Go ahead and add that one to your foodie vocabulary! So I’ll get right to the point:  Coquito Affogato IS the perfect marriage between two of my favorite food passions—> ICE CREAM AND COFFEE ♥ ♥

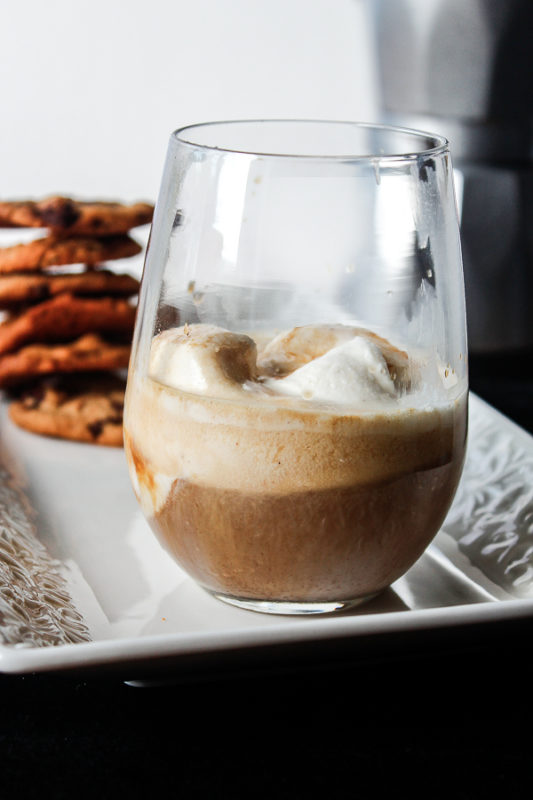
It’s the best frozen coffee dessert-y drink ever. You basically take a scoop of ice cream or gelato and “drown” it in a shot of espresso – freshly brewed espresso of course.

Affogato is not a frappucinno or iced coffee, it’s something like a float with ice cream and coffee but a lot less of the liquid.. And why just stop at a regular ol’ scoop of ice cream when you can make your very own best-ice cream-in-the-world! Hence Coquito Affogato which has my favorite –  Coquito Ice Cream  and it comes fully loaded with creamy, coconutty flavors and that hint of Bacardi blends perfectly with the espresso.

Coquito Affogato Recipe

  • PREP TIME 6 hours
  • COOK TIME 10 mins
  • TOTAL TIME 6 hours 10 mins
  • Recipe type: Dessert
  • Cuisine: Italian
  • Serves: 1

INGREDIENTS

  • 1 large scoop of Coquito Ice cream or 2 small scoops
  • 1 ounce shot of espresso
  • 1 8- ounce glass

INSTRUCTIONS

  1. Make the Coquito Ice Cream.
  2. Make espresso using manufacturer’s instructions. (Even better if you can buy a good quality, organic coffee and grind immediately before adding to espresso machine.)
    Coquito Affogato
  3. Add the scoop of Coquito ice cream to the glass.
  4. Pour the shot of espresso over the ice cream.
  5. Can add a swirl of chocolate sauce or sprinkled cinnamon for garnish.
  6. Enjoy immediately. Be careful: Very addicting! 🙂

BIRTHDAY INSPIRATION

It all started when we went out to dinner for hubby’s bday and afterwards hit up a new ice cream joint called Sprinkles and Scoops and rather than the usual sundae, banana split or stuffed waffle cone, we ordered Affogatos.  So the girl behind the counter made a fresh batch of espresso then added a large scoop of ice cream and then a shot of that Nespresso espresso. We were proudly her first Affogato customers :).

A delightful infusion of coquito ice cream and a shot of espresso – the perfect after-dinner dessert/drink.

As soon as the coffee hits the ice cream it starts to melt and now you have this wonderful creamy emulsion of creamy espresso. You can still taste the bitter notes of coffee but it’s perfectly balanced by the sweetness and cream.

That following week I made affogatos like 3 times at home!

Oh..the joys of food blogging!

On a side note: I think food blogging gives us food bloggers this badge of courage because we’ll eat something at a restaurant we fall in love with and immediately try to duplicate it in our test kitchens- and that is where all the fun happens. Cook. Test. Eat.  Nothing but fearless foodieness. (muscle flex in effect)

A major component to the awesome flavor of an affogato is fresh espresso – without it you won’t get the full volume and depth of flavor. You can substitute the ice cream with your favorite flavor of ice cream or make Coquito Ice Cream, add a shot of espresso, a drizzle of chocolate sauce and Voila!  This is the perfect after-dinner dessert/drink for 3 reasons:

1.It has ice cream which is a dessert

  1. The Coquito Ice Cream has Bacardi Rum<–Grown-up Ice Cream
  2. Fresh Espresso <–enough said

Can you hear the wedding bells in Foodie Heaven? I can…

Vegan Banana Chocolate Milk Shake Recipe


Well, I have been trying to find healthier alternatives to some of my favorite cravings. For realz! Like, I have seriously been taking that extra mental step before I throw together my walnutty, raisiny, chocolatty bon bons or pumpkin pecan rolls to ask myself: How can I make this healthier? Or can this even be made healthier? This has really helped to bring an added dimension to meal time or snack time.

In my house, healthy must also mean flavorful! creamy! rich! and outta sight dreamy!  So when I saw the creamiest, thickest, chocolattiest, banana milk shake  recipe, not only did it get my attention – wait for it- it was Vegan! Yay! I’ve made it about 10 times so far and that’s not including the times I’ve made it for hubby. I mean, I just can’t get enough of it and neither can the fam. So naturally I had to share it with you guys!

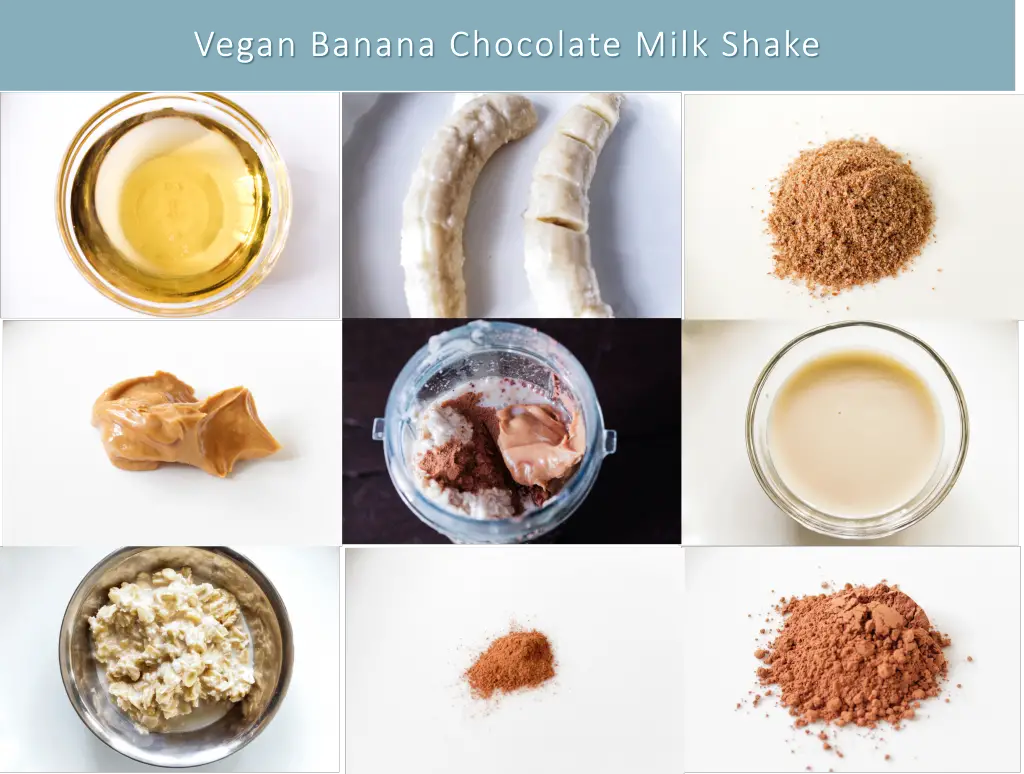
My version has rolled  oats, agave nectar for some healthy sweetness, flax seed for some potent Omegas, cinnamon for some added flavor, and my bananas are frozen.  This recipe is so easy to make, my kids are making it almost daily and adding it to their regular protein shake. I have been making it for breakfast, but this week, since I’m on a self-imposed-pre-vacation slim-down, I’m having this creamy, chocolatty yumminess in place of both breakfast and lunch. But if YOU are craving something sweet and guiltless, reach for this Vegan Chocolate Banana Beauty. Oh yeah. Words can’t describe…

I start the night before by soaking the rolled oats in coconut milk, which come to think of it reminds me of a creamy rice pudding  <- that’s already a good sign. High five comin’ right atcha!

Then, I peel a couple of ripened bananas and stick them in the freezer.  Did you know I have a thing for bananas? In the morning, or lunch or whenever,  I blend the oatmeal, frozen bananas, cacao powder, agave, flax seed, coconut milk, cinnamon and almond butter  in a blender and I’m having dessert for breakfast YO!

Vegan Banana Chocolate Milk Shake

Vegan Banana Chocolate Milk Shake Recipe

  • PREP TIME 10 mins
  • COOK TIME 1 min
  • TOTAL TIME 11 mins
  • Recipe type: Beverage
  • Cuisine: American
  • Serves: 1

INGREDIENTS

  • ½ cup Rolled Oats
  • ¾ cup of Coconut milk for soaking the oats
  • 2 Ripe bananas, peeled and frozen
  • ¾ cup Coconut or Almond milk for the shake
  • 1 tablespoon Almond Butter
  • 1 tablespoon Cacao Powder
  • 1 tsp Agave
  • ¼ tsp Cinnamon
  • 1 tsp Flax Seed

INSTRUCTIONS

Prep

  1. Soak the rolled oats in the Almond or Coconut milk for a minimum of 4 hours or overnight.
  2. Combine all ingredients in blender and blend until you have a smooth consistency – should take less than 45 seconds.

You too are gonna want to make this..a lot.. AND even enjoy tricking your mind into thinking it’s made of creamy, chocolate ice cream with swirls of fudge and sweetly, perfectly-ripened bananas and vanilla whip cream- very much like my un-vegan  Chocolate Monkey ice cream. Oh how self-deception is Bliss, though. Wouldn’t you agree? Works for me and I can just hear my hips saying “Thank You”. You are welcome.

Vegan Banana Chocolate Milk Shake

Some Thoughts To Share

I consider myself a “healthier” eater  which means I eat and cook pretty well-balanced meals. My motto is balance. If you eat healthy most of the time you should treat yourself to something decadent and rich – but obviously don’t overdo it. Either extreme could be unhealthy. So I have developed my own methodology towards eating healthy- if you will:

  • I use ground turkey, chicken breast, pork, turkey and chicken tenderloin in most meals
  • If I do fry, it’s once or twice a month, if that
  • We eat beef maybe once or twice per month
  • Don’t buy sodas
  • Make my own juices, lemonades
  • Make my own ice creams minus all the preservatives and junk
  • Make my own strawberry jelly
  • Make my own marinara sauce, pickles, pesto, sofrito, breads and bypass all the 10-syllable junk and preservatives
  • Buy nitrite free lunch meats
  • Grind my own coffee
  • Do substitute sugar for Agave, Honey, Maple Syrup or Coconut sugar in some dishes
  • Use seasonal, organic fruits and vegetables whenever possible
  • Eat mini portions of rich, decadent foods

I don’t abstain from rich foods but I do use common sense to achieve a balance and take careful thought to eating foods that make me feel good inside and out. HOWEVER, I do take the occasional dessert break- and I do mean occasional. Did you know I have “sweet teeth“? Anyway, I love my Vegan, Pescatarian, Paleoan friends – just consider me Omnivorian!  I like to eat just about anything and I’m pretty open-minded but stubborn too – sometimes (<-do they cancel each other out? Maybe lol) as long as I’m  eating feel-good, comfort food.

Cheesy Parmesan Cilantro Rice Recipe – Cheesy Inspiration


This week I was going to make a post about Banana Caramel Coconut Macaroons, then I realized I’ve been on a sweet inspiration overload this summer, can’t you tell? Oh, ok cause there was the Vegan Strawberry Chocolate Shortcake, and then the Vegan Banana Split Ice Cream  and of course, we can’t forget the Coquito Affogato and then… I lost the urge to make something desserty…no inspiration for something sweet. Hmph.. So I waited for a savory inspiration to come…and it came…in the form of this most amazing Cheesy Parmesan Cilantro Rice!

Cheesy Parmesan Cilantro Rice Recipe: college-kid certified √ and hubby approved ♥

  • PREP TIME 10 mins
  • COOK TIME 30 mins
  • TOTAL TIME 40 mins
  • Recipe type: Grain
  • Cuisine: American/Spanish
  • Serves: 6

INGREDIENTS

  • 2 cups white rice
  • 4 cups water
  • 1¼ tsp sea salt
  • 1 tbsp oil (olive, vegetable or coconut)
  • 1 cup cilantro
  • 2 tomatoes, small
  • 8 cloves garlic
  • 2 cups cream
  • 1 cup Parmesan Cheese, finely shredded
  • ¼ tsp sea salt
  • pinch of white pepper

INSTRUCTIONS

  1. Wash rice thoroughly removing any stones.
    Cheesy Parmesan Garlic Rice | Feel Good Food Blog
  2. Bring 4 cups of water, rice, salt and oil to boil over medium heat, covered. Allow rice to cook for 15 minutes then remove lid and stir the rice and cover again. Reduce heat to medium low. Let rice cook for another 10 minutes. Remove the lid and stir rice making sure it is not sticking to the bottom of the pot. Let the rice cook for another 5 minutes without a lid then take off of heat.Texture of rice should be soft and fully cooked.
  3. Thoroughly clean the cilantro and rinse off any dirt and grit. Roughly chop the cilantro, garlic and tomatoes. Add aromatics to a medium-sized saute pan cook and cook over medium heat until moisture is cooked away. Add half of the heavy cream, stirring constantly allowing the mixture to boil a little.
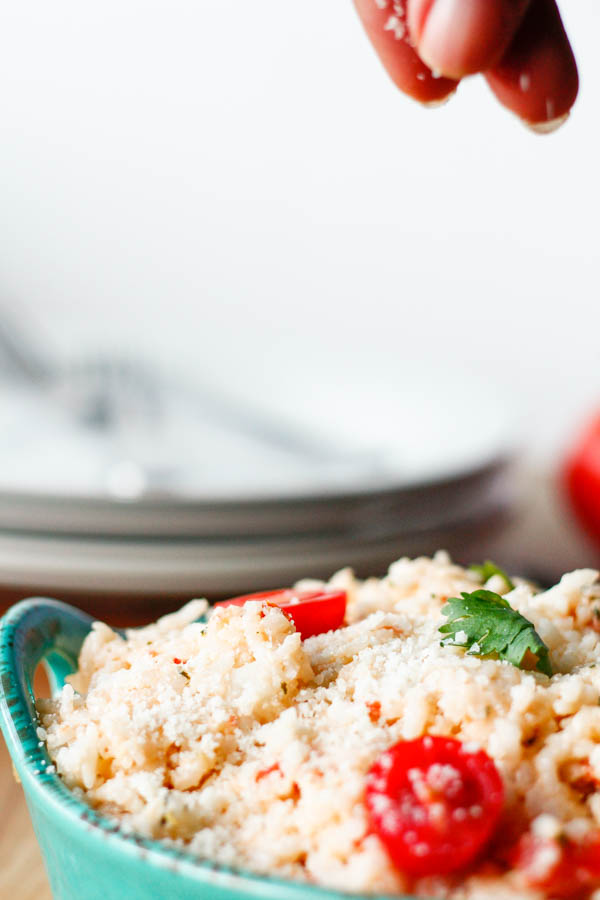
  4. Add the remaining cream and continue to stir. Lower heat and add the Parmesan cheese slowly stirring it into the creamy mixture. The mixture will begin to thicken. Continue to stir until the mixture incorporates the aromatics. It will be tinted by the tomatoes and have a slight pinkish tinge.
    Cheesy Parmesan Garlic Rice
  5. Add salt to taste and white pepper.

NOTES

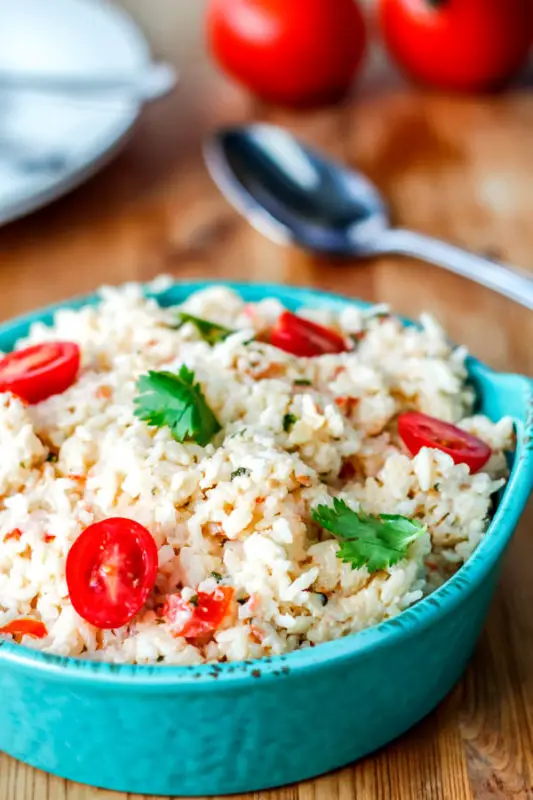
You can garnish rice with cherry tomato halves and cilantro. Consume within two days.

I’d made rice the other night for dinner – I’m Puerto Rican and eating rice is as regular as drinking water in our household – but I didn’t want regular white rice though. So it hit me – CHEESY RICE – I could make a kind of risotto rice. I know the technique would be obviously different since my rice was already cooked, but what if I added a cheesy sauce to my rice like the kind you’d add to an Alfredo pasta? Double Yum!

HELLO Inspiration!  Welcome my old friend:)  Now the wheels were turning.

  1. I already had Parmesan Cheese
  2. I had heavy cream
  3. I had some chopped up cilantro (there’s almost always cilantro in my fridge) garlic and diced  tomatoes.

I threw those in a sauté pan until most of the moisture was cooked away. Talk about an ahhhhh-mazing aroma. Raise your hand if you love the smell of sautéed garlic and cilantro wafting through the air at any given time? That’s what I thought.

Then I added a little cream, continuously stirring, and as the sauce got thicker, I added Parmesan cheese.

Cheesy Parmesan Garlic Rice | Feel Good Food Blog

What I ended up with was a dreamy, creamy Cheesy Parmesan Cilantro sauce – now all I needed was the Rice!

So I added the rice in small portions into the pan and kept stirring the rice with the sauce until it was completely infused. Amigos, I can’t think of a better way to transform white rice! And it’s a lot easier to make than risotto and tastes as goooooood.

SO THIS IS WHEN I KNEW I HAD TO BLOG ABOUT THIS RECIPE…

Right after I woke up this morning, my son kindly asks, “Mom, can you make me some of that risotto so I can pack it for lunch?” For a second, I thought I was stuck in the Foodie Twilight Zone! Who does that? Who makes Cheesy Parmesan Cilantro Rice at 7:30 am? Foodies do, and food blogger mommies do too, that’s who. ♥

Cheesy Parmesan Garlic Rice | Feel Good Food Blog

I didn’t name it risotto because I could imagine hearing the gasps in the culinary cyber world citing incorrect technique and I wouldn’t debate it- at all. Let’s just say it’s a Risotto Hack..hehehe..

Risotto is a cheesy rice dish made with Arborio rice, an Italian round rice, and you actually add the cheese as the rice is cooking – not after. I can guarantee, though, your taste buds won’t mind either way.

This dish is so versatile you can make it a one-pot meal by adding chunks of cooked chicken breast, spring peas or chopped spinach and booyah! High-five for one-pot meals.

You can garnish with chopped tomatoes to provide a nice balance: creamy/tartness

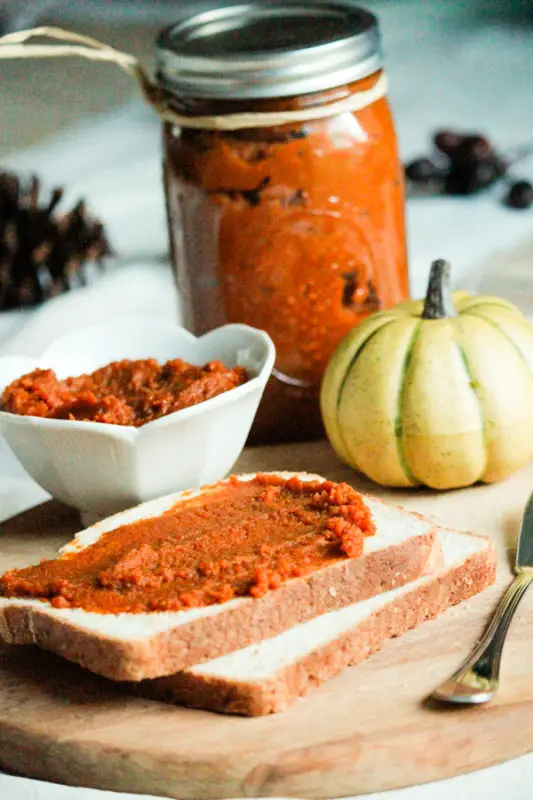
Pumpkin Butter Recipe


Pumpkin for starters is incredibly healthful but it is versatile and just straight yummy. It’s fall y’all and pumpkin brings back memories of homey, comfort goodness and love.

Pumpkin butter usually requires apple cider but I opted to add OJ for a citrusy zing and I love that it’s super simple to make.

You can add it to French Toast Casseroles, use it as a spread on raisin toast, add it to smoothies for a potassium boost or just eat it in spoonfuls – yummo!

Pumpkin Butter Recipe

  • Recipe type: Condiment
  • Serves: 6

INGREDIENTS

  • 1 (29 ounce) can of pumpkin puree
  • 2 bananas, pureed
  • ¾ of orange juice
  • 1½ teaspoon of fresh ginger
  • ½ teaspoons of ground cinnamon
  • ¾ sugar
  • 1 teaspoon of ground nutmeg

INSTRUCTIONS

  1. Combine all of the ingredients except the banana and pumpkin puree in a saucepan. Warm mixture until the sugar has completely dissolved then add the banana and pumpkin puree.
  2. Stir mixture constantly to prevent bruning and bring to a boil. When boiled, reduce the heat and simmer for 25 minutes until thickened. Stir frequently.
  3. Put pumpkin butter to a glass or plastic container and cool in the refrigerator for a minimum of 4 hours before serving.

NOTES

The mixture is very sputtery and messy so be careful not to get burned. Once a lot of the moisture begins to cook away the pumpkin butter quiets down quite a bit.

For a feel-good food twist you can add banana puree to the pumpkin butter!

Pumpkin butter is very sputtery as it is cooking but calms down as the moisture is reduced and it thickens. Try pumpkin butter on fresh bread as a snack!